

For years, I avoided trying to make homemade caramels because I thought it was going to be too hard. Scratch that — I knew it was going to be too hard. Because 80% of my prior attempts to make caramel ended in either a burnt, nasty mess or a crystalized, decidedly not-amber-colored chunk of rock. And it was infuriating.
Recipes would cavalierly tell me it was easy. They would tell me to stir the sugar. They would tell me never, under any circumstances should I stir the sugar. They would make it sound like making caramel is the easiest thing in the world! And I would feel like a fool for not being able to get a handle on it. And then I would be filled with rage.
So, in a fit of stubborn pride last fall, I decided I was going to figure this out once and for all. I tried a bunch of different recipes. I read a ton of articles online. And, thank god, in my determined scouring of the internet I found Sandy Arevalo’s Artisan Caramels.
The recipes in this little book (I bought the kindle edition and encourage you to do the same) are variations on the same basic recipe. Some reviewers were pissed off about that (as reviewers are wont to be), so I decided to try making a batch before offering up $5 for access to the rest of them.

Best $5 I’ve ever spent. Not because I really needed the rest of the book/recipes, but because the magical base recipe for these caramels was absolutely worth my $5. And I do believe in saying thanks.
Now, rather than going on to extoll the virtues of these caramels — which are both delicious and 78% less fussy than every other recipe I’ve tried — I want to pause and just list some important things I’ve learned about making caramel:
- It’s easier with an electric stove. Gas heats faster and less evenly (unless you have an especially fancy pot), and it’s much, much easier to burn/screw up. This has proved true of every caramel attempt I’ve ever made. If you can successfully make caramel on a gas stove, my hat is off to you. I won’t even try anymore.
- Whether you are making caramel using the dry method (just melting sugar) or the wet method (melting sugar with water added) don’t stir the caramel. I don’t care what the recipe says. There’s some crazy voodoo going on with chemistry that makes sugar crystalize instead of melting properly if you even breathe on it wrong. So, don’t stir it. Just hold your breathe and gently swirl (if you must) and hope for the best.
- These are technically “cream caramels.” Most recipes have you caramelize sugar (see #2), then add it to hot cream. That strategy is fussy, easy to screw up, and more dangerous. These wonderful confections skip all that hassle and make life much, much easier. In other words, forget what I said in #2. You add everything into the pot at once, and you stir to your heart’s content. But if we’re being 100% technical, that means they aren’t really caramel. Fussy as I am about sweets, this doesn’t matter to me in the least. These caramels are awesome — and made even more so by how much easier they are to make.
I went a little overboard last fall. I think I made at least a dozen batches in my various flavor experiments… and everyone got caramels for Christmas. And they were a huge hit. I’ve now made so many batches of these (and tinkered with flavors so many times), I could make this recipe in my sleep. I don’t even have to look it up. It’s that easy.

I’m not really one for “secret” recipes, but part of me is hesitant to post this recipe because I think caramels are going to be my go-to Christmas thing for the foreseeable future. But! I believe that sharing is caring. I also doubt most of the folks on the receiving end of my caramel care packages can be bothered to actually make them at home. If they do, though, I want them to be able to.
So. Without further ado, here is the recipe for the easiest, most delicious homemade caramels out there.
**Note, when I make a reasonable size batch of these, I use the proportions below. The book’s basic recipe is double this, which makes approximately 10-12 dozen caramels (which is a lot). If you want to double the recipe, use a half-sheet pan (13×18). It’ll take around an hour to reach the right temp, and use your biggest soup pot.
Easy Homemade Caramel Candies – Salted Vanilla Variation
- 2 cups granulated sugar
- 2 cups heavy cream
- 1 cup corn syrup
- 6 Tablespoons butter
- 1/2 Tablespoon vanilla
- 1/2 Tablespoon sea salt
Spray an 8×8 or 9×9 pan lightly with cooking spray. Cut two strips of parchment paper to line the pan – forming a cross (+) in the bottom of the pan (see picture above). In other words, two strips of parchment 8 or 9 inches wide and 15-20 inches long to set in the pan at 90 degree angles. This makes it really easy to pull the block of caramel out after it sets. This is less fussy than trying to fold the paper into the pan.
In a heavy-bottom, large saucepan combine the sugar, cream, corn syrup, and butter. Heat over just-past-medium heat. If you have numbers on your stove, #6 is perfect. Don’t go over that, as it’s easy to burn/ruin your caramel.
Insert a candy thermometer and stir pretty frequently with a silicone spatula until the thermometer reaches between 245-248° F — just below firm ball stage. Note, it will bubble up pretty significantly, then reside before reaching the right temperature, so use a big pot. It’ll also take roughly 40 minutes, so this does entail hanging out at the stove for quite a while. You need to stir pretty often to make sure the mixture heats evenly and the bottom doesn’t burn. The temperature will determine the texture of your caramels, so I tend to aim for 246°. But it depends on your altitude and thermometer and whatnot. Just don’t let it get over 248° as you’ll end up with sugar-rocks rather than chewy deliciousness.
When it hits the desired temperature range, quickly remove from heat and stir in the vanilla and sea salt. It’ll bubble an spit when you add the vanilla, so be careful. Work quickly to mix and then pour the caramel into the prepared pan.
Let it set for at least 8 hours. Don’t stick it in the fridge. Be patient. Use your time to cut out squares of parchment paper – you’ll need a ton of them. A pan this size usually makes 60-80 caramels (since I’m not good at precise cutting).
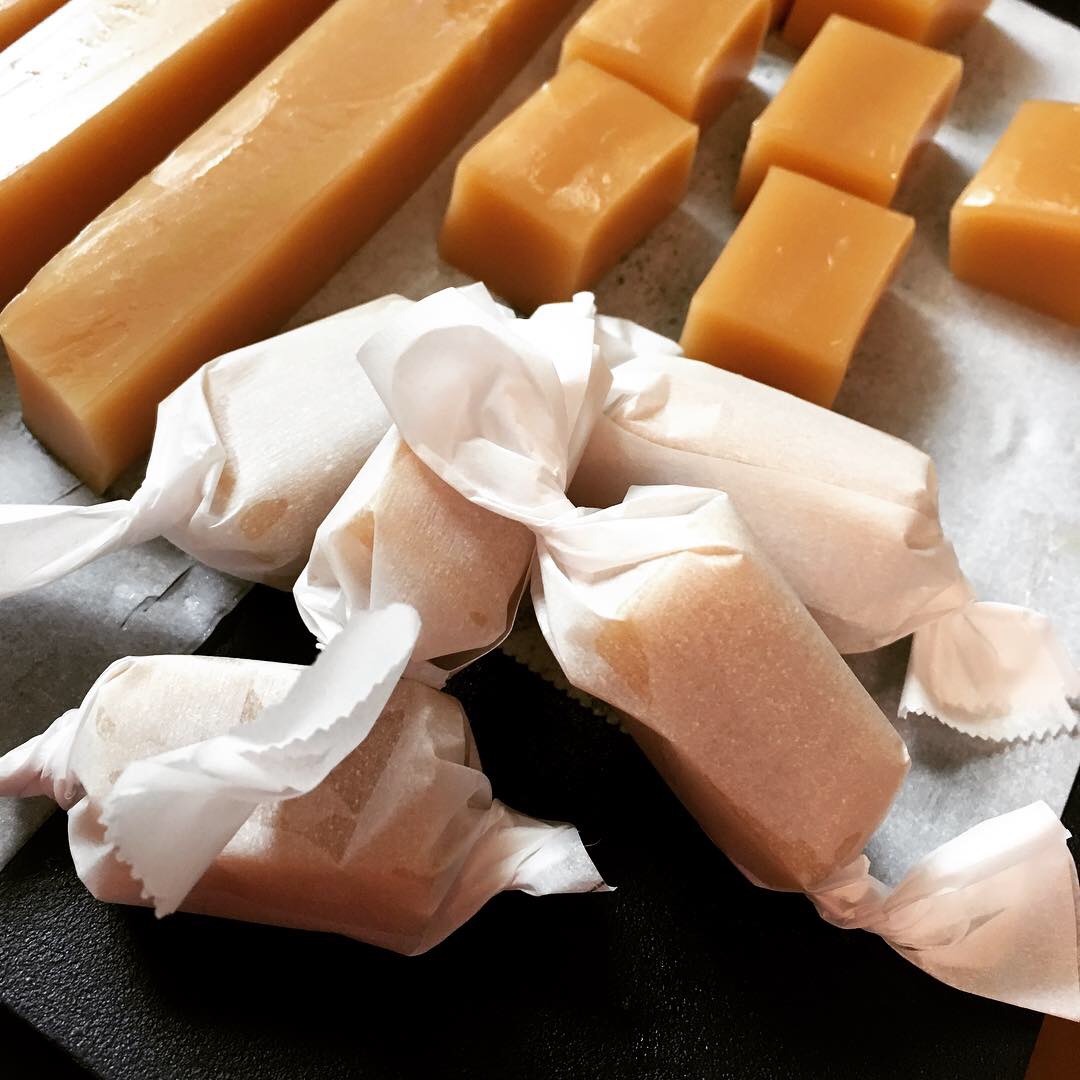
Once it’s set, remove from pan and place on a cutting board. Use a sharp to cut into 1 inch strips, then cut those into smaller chunks. Wrap each one individually in parchment paper, then spread the joy to everyone around you!
Note: in the hopes of some (far off) day being able to quit my day job, this post contains affiliate links. I only link to things I actually recommend, and I might earn a commission if you end up buying something. That would be cool, but no worries if it’s not your thing.
