

It feels moderately absurd to be posting this “recipe” for hazelnut brittle – given that it contains all of two ingredients. However! It’s a vital component in a really lovely White Chocolate Hazelnut Blondie Pie (post/recipe forthcoming), and I can, at least, offer some helpful tips and insights on getting this to come together properly.
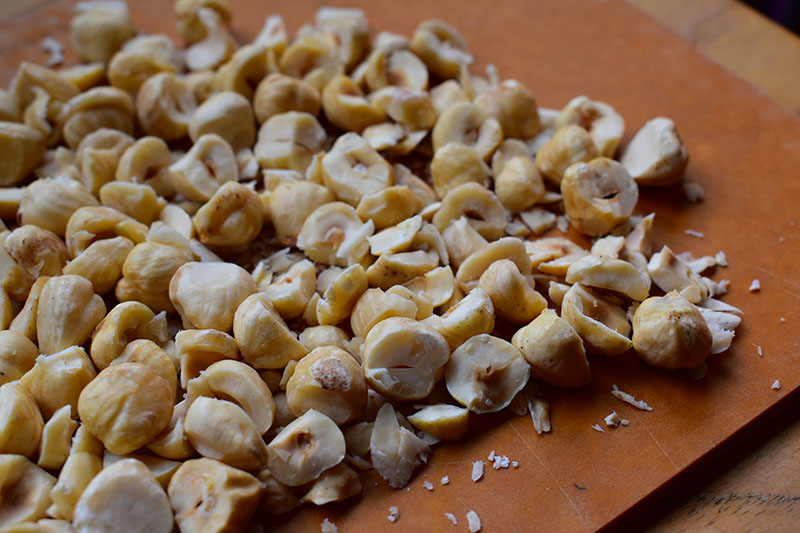
First of all, a note on hazelnuts: getting the skins off of them is a royal pain – and/but the skins are bitter and do affect flavor. So, you want them off. I recommend acquiring some that have been pre-toasted and skinned. Trader Joe’s sells some that are usually at least half de-skinned, but I opted to order some online that had been very effectively blanched. Those needed a bit of extra toasting to really enhance the flavor, but they are skin-free! Which is a bit miraculous.
Second, much to my shock, this recipe calls for constant stirring of the sugar as it caramelizes. This goes against basically everything I ever thought I knew about making caramel. But it apparently works, so I took some pictures to document the process – in case you find the crystalizing/chunky-ness as ominous as I did the first time I made this. (I’ve now successfully made this a handful of times, so I’m confident that it does work, even if appearances would initially lead me to suspect otherwise).
As you’ll see in the directions below, once the sugar starts melting, you stir it constantly to ensure it doesn’t burn. The process is really chunky and crusty and seems very counterintuitive to the smooth and amber liquid that eventually results. Just keep stirring, and once it starts to really liquify, work on getting the bigger crystal chunks to melt.
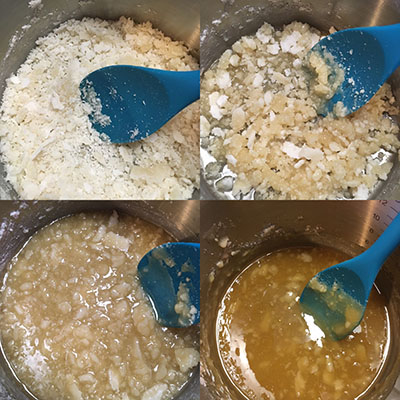
Also somewhat important to note: be careful not to let it burn. Burnt caramel tastes TERRIBLE. Once the mixture gets a nice, rich, amber color, don’t push your luck. It’s done and yummy, and you have to work quickly to stir in the hazelnuts and get it onto the silicone baking mat. It’ll start to harden up pretty fast, so don’t dilly dally. And don’t bother trying to get every last bit of it out of the pan, it won’t work. Resign yourself to some crusty caramel attached to the side of the pan – it’s fine.

Finally, pictured above is one of my very favorite kitchen utensils – the versatile silicone “spoonula.” I highly recommend treating yourself to one of these (typically) under $10 kitchen utensils. They’re great.
Ingredients are listed in the order they appear in the recipe and anything that requires prep is in bold. Ingredients are bolded in the directions when you first encounter them and the quantity required is included.

Simple Hazelnut Brittle
- 3/4 cup chopped, toasted hazelnuts
- 1 1/2 cups granulated sugar
Required equipment: medium saucepan, silicone spatula, silicone baking mat .(I do not recommend making this without a baking mat, but greased parchment paper might be a reasonable substitute). Similarly, a wooden spoon will probably do in a pinch, but a lot of your sugar is going to stick to it.
Place your silicone baking mat in a rimmed baking sheet, and set aside. You can spray with cooking spray if you like, but it’s not necessary. (Note: make sure your pan is on a trivet or heat resistant surface, since it’ll get very hot when you poor the brittle mixture into it.)
Next, make sure your 3/4 cup hazelnuts are prepped – toasted and de-skinned and roughly chopped. Set aside, ready to immediately dump into the saucepan when the toffee is cooked.
In a medium saucepan, add the 1 1/2 cups granulated sugar and turn the heat on to medium high. As soon as the sugar starts to melt (a minute or two), begin to stir with a silicone spatula – constantly moving the sugar around to avoid burning. The mixture will get very chunky (see pictures above), just keep stirring until it melts and begins to turn amber. As the sugar liquifies, focus on pressing out the chunky bits and keeping the mixture moving. It’s done when the mixture is a warm, dark amber and no major chunks remain (probably 7-10 minutes).
Remove from heat and immediately dump in the chopped hazelnuts. Working quickly, stir to combine/coat the hazelnuts and then dump the mixture onto the prepared pan. Use your silicone spatula to move the chunks of hazelnut around/break up the bigger chunks and try to somewhat evenly distribute. You’ll only have a few moments to even the mixture out, as it will begin to harden as soon as it’s out of the pan.
Allow to cool completely (maybe 30 minutes) before breaking or chopping into chunks.

Disclaimer: in the hopes of some (far off) day being able to quit my day job, this post contains affiliate links. Unless otherwise noted, I only link to things I actually recommend, and I might earn a commission if you end up buying something. That would be cool, but no worries if it’s not your thing.

Once again your post leaves me drooling!
LikeLike